For shallow-pitch PV systems, a wifi-controlled system with a camera monitor may be your last, best hope.
Ice-Buster. When you're stuck with shallow-pitched PV panels, de-icing cables coupled with smart plugs may be an option.
WITH THE SERVICES of Revision Energy, one of the most respected solar installers in Southern Maine, I followed the ridiculous sightline standards of Portland's Historic Preservation Office, while installing my 7-kilowatt solar array.
What I ended up with was modestly pitched solar panels on a flat roof. The panels actually should prolong the life of the EPDM roof, and keep the building a little cooler in the summer, but in the winter, I typically lose a couple of weeks of power generation because of snow piling up. I thought it prudent to install a solar panel defrosting system to make sure that as the snow melts, it doesn't freeze into ice dams at the bottoms of the panels.
A Field Test Before Installation
It turns out that no one I talked to could offer an affordable and effective PV de-icing solution, so I decided to create my own, using roof de-icing cable. First, I picked up a 60-ft. self-contained cable to try, and last winter, I clipped it to the trailing edge of a few of my pv panels with tension clamps. Then, after bad icing or snow events, I simply plugged the cable in to a heavy duty extension cord. The results were surprisingly effective. The 60-ft. cable cleared enough of the ice from the base of the panels to protect them from freeze-thaw damage, and slightly sped up the melting process overall.
Reading up on how these cables work, most use about 5 watts per linear foot. So in theory, 60 ft. would draw only about 300 watts. My system wasn’t yet complete, but I wanted to make sure a single circuit could handle the entire roof—about 160 ft. total of cable length, or a total of about 800 watts. That’s well below the 1800-watt max of a standard 15-amp circuit, with plenty of juice left over to charge my remote camera.
Full-On Melting
This fall, I purchased another 100 ft. of deicing cable, and had a new 20-amp, ground fault-protected circuit in armored cable run to the roof, and placed inside a jumbo all-weather plastic box. I experimented with ways to attach the de-icing cable to the panels, and found that using Gorilla tape offered the simplest and least destructive solution. I attached the cable at 12-inch intervals to the trailing edge of each panel, flush with the surface to allow water flow. I would guess that the heating cable will have a lifespan of about 5 years at best, and can be easily removed. For the rest of the cable, I followed the natural contours of the panels and their supports. As a result, the final de-icing cable is all but invisible. Each length of cable has its own grounded plug, which I left dangling near the power junction.
For the junction box, I ordered a jumbo weatherproof cover. I know the roof takes a beating all year in Maine, and I wanted my special plugs well protected. Lowes didn’t carry them big enough, so I had to order it online.
A Phone-Ready Wifi Switch
Next, I purchased a Wemo Insight wireless outlet, along with a Wemo Mini from Belkin. Although designed for interior use, I hope my big weatherproof box will keep it working. With a Wemo Insight, you can not only control when an outlet turns off and on—you can Monitor the power its using from a smartphone using the free Wemo App from Belkin. I tested the power draw from both ice-melting cables and found that they pull 926 watts, a bit more than my estimate, but still well below the 1800-watt resistance rating of the Wemo mini plug. I switched over to that plug simply because once i had the power usage data, i didn't need that feature any more.
To put both cables on one wemo, I plugged a simple 3-prong splitter into it, giving me two grounded outlets controlled by the Wemo—enough for both de-icing cables. I had one outlet left over, so I used it to plug in the usb charger for an Arlo wifi camera, attached to the chimney that surveys the PV panels. This way, wherever I am, I can take a quick look at the roof and turn on the de-icing when it’s needed.
Solar In—Ice Melting Out
You’re probably wondering, like I was, how much of my precious solar credits will be consumed by this ice-melting necessity. Here’s an estimate. In a bad winter, we might have 7 or 8 snow/ice events that warrant some melting on the roof. Let’s say that in each case, I leave the cables on for about 12 hours after the storm. That’s a total of about 96 hours (for 8 storms) at 926 watts. At 11 cents/kilowatt as the going rate for residential power, that’s about $10 worth of electricity per winter. My system peaks at 6 kilowatts per hour, so put another way, it takes my roof about 12 hours of solar at peak performance to make that much power.
Ultimately, I’m hoping my snow melting efforts become quaint artifacts, like leaky single-pane windows. Perhaps the presence of solar panels on roofs in Portland’s densely inhabited neighborhood will become a welcome sign or environmental responsibility. For a city that prides itself on progressive politics, the fact that I have to hide my solar panels is ironic to the point of stupidity. Have you ever watched people walk down a city street? The fact is, they never look up. And if they did happen to glance skyward, perhaps the glint of shimmering solar panel might inspire them to break their own fossil fuel addictions. Let’s hope future Historic Preservation bureaucrats will be asking people why they have so few solar accessories, not what color they intend to spray paint a vent pipe.
Veteran journalist Matt Power has reported on innovation and sustainability in housing for nearly three decades. An award-winning writer, editor, and filmmaker, he has a long history of asking hard questions and adding depth and context as he unfolds complex issues.


Remote Control Snow Melting for Rooftop Solar
For shallow-pitch PV systems, a wifi-controlled system with a camera monitor may be your last, best hope.
Ice-Buster. When you're stuck with shallow-pitched PV panels, de-icing cables coupled with smart plugs may be an option.
WITH THE SERVICES of Revision Energy, one of the most respected solar installers in Southern Maine, I followed the ridiculous sightline standards of Portland's Historic Preservation Office, while installing my 7-kilowatt solar array.
What I ended up with was modestly pitched solar panels on a flat roof. The panels actually should prolong the life of the EPDM roof, and keep the building a little cooler in the summer, but in the winter, I typically lose a couple of weeks of power generation because of snow piling up. I thought it prudent to install a solar panel defrosting system to make sure that as the snow melts, it doesn't freeze into ice dams at the bottoms of the panels.
A Field Test Before Installation
It turns out that no one I talked to could offer an affordable and effective PV de-icing solution, so I decided to create my own, using roof de-icing cable. First, I picked up a 60-ft. self-contained cable to try, and last winter, I clipped it to the trailing edge of a few of my pv panels with tension clamps. Then, after bad icing or snow events, I simply plugged the cable in to a heavy duty extension cord. The results were surprisingly effective. The 60-ft. cable cleared enough of the ice from the base of the panels to protect them from freeze-thaw damage, and slightly sped up the melting process overall.
Reading up on how these cables work, most use about 5 watts per linear foot. So in theory, 60 ft. would draw only about 300 watts. My system wasn’t yet complete, but I wanted to make sure a single circuit could handle the entire roof—about 160 ft. total of cable length, or a total of about 800 watts. That’s well below the 1800-watt max of a standard 15-amp circuit, with plenty of juice left over to charge my remote camera.
Full-On Melting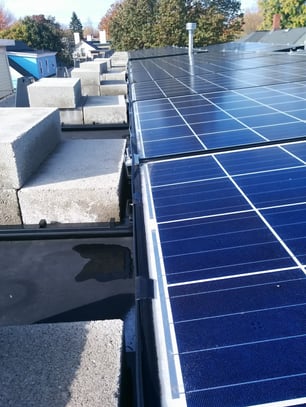
This fall, I purchased another 100 ft. of deicing cable, and had a new 20-amp, ground fault-protected circuit in armored cable run to the roof, and placed inside a jumbo all-weather plastic box. I experimented with ways to attach the de-icing cable to the panels, and found that using Gorilla tape offered the simplest and least destructive solution. I attached the cable at 12-inch intervals to the trailing edge of each panel, flush with the surface to allow water flow. I would guess that the heating cable will have a lifespan of about 5 years at best, and can be easily removed. For the rest of the cable, I followed the natural contours of the panels and their supports. As a result, the final de-icing cable is all but invisible. Each length of cable has its own grounded plug, which I left dangling near the power junction.
For the junction box, I ordered a jumbo weatherproof cover. I know the roof takes a beating all year in Maine, and I wanted my special plugs well protected. Lowes didn’t carry them big enough, so I had to order it online.
A Phone-Ready Wifi Switch
Next, I purchased a Wemo Insight wireless outlet, along with a Wemo Mini from Belkin. Although designed for interior use, I hope my big weatherproof box will keep it working. With a Wemo Insight, you can not only control when an outlet turns off and on—you can Monitor the power its using from a smartphone using the free Wemo App from Belkin. I tested the power draw from both ice-melting cables and found that they pull 926 watts, a bit more than my estimate, but still well below the 1800-watt resistance rating of the Wemo mini plug. I switched over to that plug simply because once i had the power usage data, i didn't need that feature any more.
To put both cables on one wemo, I plugged a simple 3-prong splitter into it, giving me two grounded outlets controlled by the Wemo—enough for both de-icing cables. I had one outlet left over, so I used it to plug in the usb charger for an Arlo wifi camera, attached to the chimney that surveys the PV panels. This way, wherever I am, I can take a quick look at the roof and turn on the de-icing when it’s needed.
Solar In—Ice Melting Out
You’re probably wondering, like I was, how much of my precious solar credits will be consumed by this ice-melting necessity. Here’s an estimate. In a bad winter, we might have 7 or 8 snow/ice events that warrant some melting on the roof. Let’s say that in each case, I leave the cables on for about 12 hours after the storm. That’s a total of about 96 hours (for 8 storms) at 926 watts. At 11 cents/kilowatt as the going rate for residential power, that’s about $10 worth of electricity per winter. My system peaks at 6 kilowatts per hour, so put another way, it takes my roof about 12 hours of solar at peak performance to make that much power.
Ultimately, I’m hoping my snow melting efforts become quaint artifacts, like leaky single-pane windows. Perhaps the presence of solar panels on roofs in Portland’s densely inhabited neighborhood will become a welcome sign or environmental responsibility. For a city that prides itself on progressive politics, the fact that I have to hide my solar panels is ironic to the point of stupidity. Have you ever watched people walk down a city street? The fact is, they never look up. And if they did happen to glance skyward, perhaps the glint of shimmering solar panel might inspire them to break their own fossil fuel addictions. Let’s hope future Historic Preservation bureaucrats will be asking people why they have so few solar accessories, not what color they intend to spray paint a vent pipe.
By Matt Power, Editor-In-Chief
Veteran journalist Matt Power has reported on innovation and sustainability in housing for nearly three decades. An award-winning writer, editor, and filmmaker, he has a long history of asking hard questions and adding depth and context as he unfolds complex issues.